When I first started helping homeowners inspect for bed bugs, I noticed a pattern. Most people waited far too long before taking action.
By the time they called for help, the bugs had already spread from the mattress into couches, baseboards, and even clothing drawers.
Today, things are no different.
Bed bugs are still masters at hiding, and most infestations start small with only a few early warning signs.
The trouble is that people often mistake those signs for something else, wasting weeks while the infestation grows.
In this guide, I’ll share the exact inspection steps I use when helping families confirm whether they have bed bugs.
You’ll learn the five most reliable early signs that prove an infestation is present.
You might be wondering why my advice matters. Here’s why you can trust what you’re about to read:
- I’ve spent years working with pest control professionals and walking homeowners through DIY bed bug inspections.
- Every step in this article is based on real-world detection methods that experts use in the field.
- I only recommend practical checks and tools that you can use immediately, without wasting money on gimmicks.
By the end, you’ll know how to spot bed bugs early, before they take over your home.
More importantly, you’ll have a clear action plan to help you get rid of bed bugs so you can sleep peacefully again.
Disclosure: Some of the product links in this guide are affiliate recommendations. They’ve been independently tested for safety and effectiveness, and using them supports this site at no extra cost to you. You can read more about our testing methodology here
The 5 Early Signs of a Bed Bug Infestation You Can Trust
When it comes to detecting bed bugs early, guesswork isn’t enough. You don’t just rely on bites or random itches; you need physical evidence.
Think of it like solving a crime scene. The suspects may be hiding, but they always leave traces behind.
Based on field research and homeowner inspections, these five signs show up in most active infestations.
Unlike bites, they don’t vary from person to person, and each one gives you clear evidence of where bed bugs are feeding, hiding, and reproducing.
1. Fecal Dots (The Smear Test)
One of the most common early signs is bed bug fecal spots. They look like someone tapped a black felt-tip pen on your sheets: small dots the size of a period, dark brown to black, often clustered near sleeping areas.
The easiest way to confirm them is with the smear test. Dab a spot with a damp tissue or cotton swab. If it smears into a reddish-brown or rust-colored stain, it’s digested blood from a bed bug. Dirt or lint won’t smear the same way.
Check these areas first:
- Mattress seams and piping
- Pillowcases and fitted sheet edges
- Box spring fabric, especially corners where the wood frame meets fabric
If you see clustered dots that smear like dried blood, you’ve got one of the strongest early indicators of bed bugs.
2. Rusty Blood Stains on Bedding
Another telltale clue is blood stains left behind when you accidentally crush a bed bug after it feeds. These don’t look like fresh, bright-red blood from a scratch. Instead, they’re darker, rust-colored smears with uneven edges.
You’ll often find them on:
- Pillowcases
- Fitted sheet corners
- Areas where your skin presses against bedding during the night
Not everyone gets this sign — light sleepers or very small infestations may not leave stains. That’s why it’s best used alongside other evidence.
3. Shed Skins (Molted Exoskeletons)
Bed bugs molt five times as they grow, leaving behind shed skins that look like empty, translucent shells. They range from 2–5 millimeters long, golden-brown, and hollow inside.
Check hiding spots like:
- Mattress seams and tufts
- Behind headboards
- Upholstered furniture seams
- Cracks near outlets or baseboards
Shed skins don’t move or scatter like live bugs, which makes them easier to confirm. Finding a single shed skin may mean you’ve caught them early. Finding many, in different sizes, suggests they’ve been feeding and reproducing for weeks.
4. Eggs and Eggshells (About 1mm Each)
Bed bug eggs are tiny — about 1 millimeter long — pearl-white, and slightly sticky so they cling to surfaces. After hatching, the eggshells remain behind, matte and translucent.
Female bed bugs usually lay eggs in protected, hard-to-reach places:
- Deep mattress seams
- Bed frame cracks
- Behind picture frames
- Along carpet edges
You’ll rarely find a single egg. Instead, they appear in clusters of 5–20. Spotting fresh eggs usually means the infestation is recent. Finding mostly empty eggshells means the population has already been active for at least 10–14 days.
5. Live Bed Bugs (Adults and Nymphs)
Finally, the most obvious sign is spotting live bugs. Adults are about the size of an apple seed — 5–7 millimeters, flat, and reddish-brown. After feeding, they swell and turn a darker, mahogany color.
Nymphs (younger bed bugs) are smaller, translucent, and harder to see unless they’ve recently fed.
The best time to spot live bed bugs is an hour before dawn, when they’re most active. Use a flashlight and inspect:
- Mattress seams and box spring corners
- Upholstered chairs or couches near the bed
- Cracks as thin as a credit card
Bed bugs don’t fly or jump, but they move quickly when disturbed. If you see small, flat, brownish insects scurrying away from light, chances are high you’ve found your culprits.
Pro tip: Don’t confuse bed bugs with look-alikes like carpet beetles (round and fuzzy) or booklice (much smaller and lighter in color). If you’re not sure, capture one in a clear container and compare it to identification photos from trusted sources like the EPA or your local university extension office.
Why Bed Bug Bites Alone Are Not Proof
Imagine you wake up with three itchy red bumps in a straight line on your arm.
Your first thought is bed bugs. Your neighbor doubles down with the classic myth: “They always bite in threes.”
The truth is bites alone are one of the least reliable ways to confirm a bed bug infestation.
Relying on them can lead you down a frustrating and expensive rabbit hole.
Some people never react to bed bug bites at all, while others break out in angry welts.
Reactions can appear immediately, or they may take up to two full weeks to show. That variability makes skin symptoms almost useless as a stand-alone diagnostic tool.
Why Bite Reactions Vary So Much
Your immune system treats bed bug saliva like an allergen, and everyone responds differently. Research and pest control data show:
- About 30% of people don’t show any reaction, even when bed bug feeding is confirmed through other evidence.
- Roughly 40% of people experience mild bite reactions that look almost identical to mosquito bites, flea bites, or eczema.
- The California Department of Public Health notes that reactions can appear within minutes or take up to 14 days to develop.
Age matters too. Children and elderly adults often have more intense reactions compared to healthy adults in their 20s and 30s. If kids in your home are showing visible welts while adults aren’t, that pattern can point toward bed bugs.
Common Bite Look-Alikes
Bed bug bites are often confused with other skin irritations. Here’s how they differ:
- Mosquito bites: Larger, isolated, and usually on exposed skin like arms, legs, and neck. They appear within minutes.
- Flea bites: Concentrated around ankles and lower legs, often in irregular clusters. They itch more intensely than bed bug bites but fade faster.
- Spider bites: Almost always single bites, often with a visible puncture mark in the center. Spiders don’t feed repeatedly or target humans in bed.
The Cleveland Clinic emphasizes that even doctors can’t diagnose bed bugs by bite marks alone. Dermatologists rely on physical inspection and evidence, not skin reactions, to confirm infestations.
And let’s kill the myth once and for all: bed bugs don’t “always bite in lines of three.”
Sometimes bites cluster. Sometimes they appear scattered. The “breakfast, lunch, and dinner” pattern is folklore not science.
When Bites Actually Help Your Case
Bites can support your case only when paired with physical signs of bed bugs. For example:
- You’re finding fecal spots on your mattress and shed skins near the headboard.
- You’re waking up with clustered bites on your torso while your partner shows no reaction.
- Bites appear only after sleeping in your bed but stop when you sleep elsewhere.
In these cases, bites strengthen the evidence, but they’re never enough on their own.
Action Plan: How to Use Bite Evidence Correctly
- Document carefully. Take clear photos of any suspected bites and note the time and place they appeared.
- Look for supporting signs. Combine bite evidence with an inspection for fecal dots, blood stains, shed skins, eggs, or live bugs.
- Don’t jump to conclusions. Remember that other pests (mosquitoes, fleas) and skin conditions can mimic bed bug bites.
- Confirm before acting. Only when physical evidence lines up with bite patterns should you consider calling a licensed exterminator or starting treatment.
Finally, bites tell you that something is feeding on you. Physical signs tell you what. The smartest approach is to track both but always lean on hard evidence before making costly decisions.
The 10-Minute Bedroom Inspection for Bed Bugs
You’ve read about the early warning signs. Now it’s time to test your room.
Instead of tearing apart your bedroom for hours, you can confirm or rule out a bed bug infestation with a focused 10-minute inspection routine.
Done correctly, this quick check reveals about 85% of active infestations even small ones.
Think of it as smart detective work. Too many people skip straight to expensive treatments or call an exterminator without checking first.
Ten minutes of careful inspection can save you hundreds of dollars and weeks of unnecessary stress.
Tools You’ll Need
You don’t need professional gear to find bed bugs. A few simple tools are enough:
- A flashlight (your phone’s LED or camera flash works, but a steady light is best)
- A credit card or thin putty knife to probe mattress seams
- A magnifying glass or your phone’s zoom function
- A plain white sheet of paper for contrast against dark spots
Pest control technicians use advanced tools, but for a basic home inspection, these simple items work perfectly.
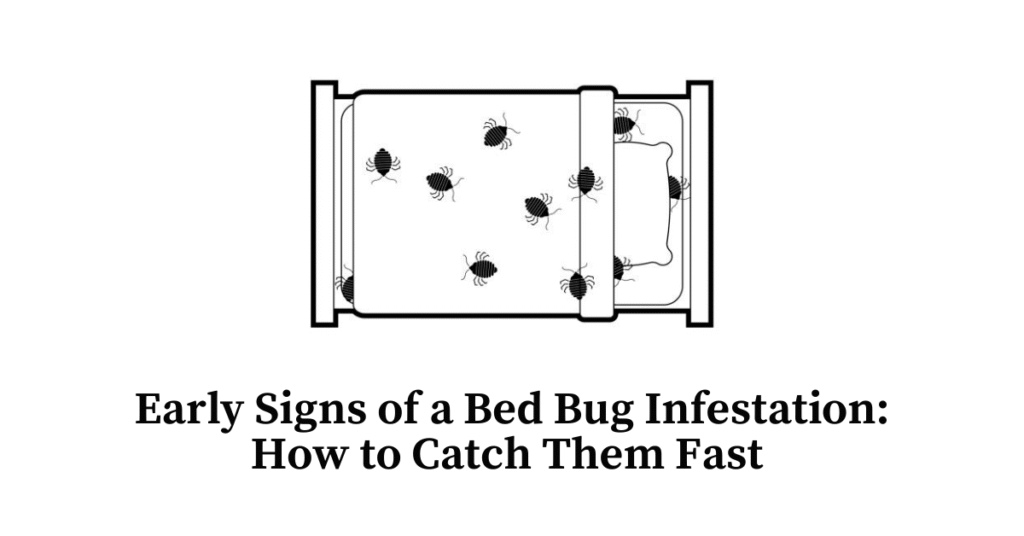
Where to Look: High-Probability Zones
Bed bugs hide where you sleep and rest, especially close to their food source — you. Start with these spots:
- Mattress seams and piping: Pull back the sheets and shine your flashlight slowly along seams, especially near the head of the bed. Look for fecal spots, shed skins, or tiny eggs. Use your credit card to gently check inside folds and stitching.
- Box spring corners: Pay close attention to the junction where the wooden frame meets the fabric. This is one of the most common hiding places.
- Bed frame and headboard: Wooden frames and upholstered headboards are notorious harborage sites. Inspect cracks, bolt holes, fabric seams, and buttons.
- Nearby furniture (within 8 feet): Nightstands, dressers, and chairs can harbor bed bugs. Check drawer joints, furniture legs, and upholstered areas.
Inspection Technique: Slow and Systematic
Bed bug detection requires patience. Here’s how to avoid mistakes:
- Work in order. Finish inspecting the mattress before moving to the box spring, and complete the bed before checking other furniture.
- Use angled light. Shine your flashlight at a slant across surfaces to highlight small objects like eggs and skins.
- Document everything. If you find something suspicious, take a photo before disturbing it. Place samples in a clear container or sealed plastic bag, and note the date and location.
Pro tip: Rushing ruins accuracy. A slow, steady 10-minute inspection beats a sloppy 3-minute scan every time.
What Counts as Positive Evidence
Not all signs carry equal weight. Here’s how to interpret what you find:
- Fecal spots: One dot may be inconclusive, but three or more clustered together confirms feeding activity.
- Shed skins: A single skin could be old. Multiple skins in different sizes show an active, growing infestation.
- Blood stains: On their own, they’re not proof. Combined with fecal spots or shed skins, they strongly suggest bed bugs.
- Live bugs: This is definitive proof, though daytime sightings are rare. Bed bugs are most active between 1–5 AM.
If your inspection reveals none of these signs, chances are you’re dealing with something else. Maybe mosquitoes, fleas, allergies, or even skin irritation from detergents.
When the Check Comes Up Empty
A clean inspection doesn’t always mean you’re in the clear. Small, newly established populations may not leave much evidence yet.
If you’re still experiencing unexplained bites or skin reactions, the next step is monitoring with interceptor traps around your bed. These passive devices catch bed bugs over time and can confirm activity.
For renters, it’s wise to document your inspection with photos, especially if you find no signs. This protects you later if bed bugs appear and landlord responsibility comes into play.
Finally, a 10-minute inspection is the fastest way to separate suspicion from reality. It gives you immediate answers, and if evidence is found, you’ll know exactly what to do next.
Confirm Early With Monitors and Traps: Your First Line of Defense
So, you did the 10-minute inspection drill and seen suspicious spots. Maybe they’re fecal stains, maybe they’re dust.
Or maybe you’re still waking up with fresh welts and no smoking gun.
That’s where detection tools step in. Their job isn’t to wipe out the enemy, it’s to confirm the enemy exists and tell you where they’re coming from.
Think of monitors and traps as early warning systems in a battlefield campaign.
They don’t end the war, but they stop you from wandering blind into an ambush.
Catching a small unit of bed bugs early can prevent a full-scale invasion, and they’re equally critical for post-treatment surveillance so you know if the enemy’s regrouping.
Now, here’s the thing…
Most of what’s sold online and in hardware stores is junk. Sticky traps? Gimmicks. Random plastic dishes? Easy bypass routes.
The weapons worth your money fall into two categories:
- Interceptor Traps: cheap, reliable sentries that work while you sleep.
- CO₂-Baited Monitors: pricier, specialized lures that pull bugs out of hiding.
Miss this distinction, and you’re throwing cash and time into the fire.
Interceptor Traps: Your Most Reliable Scout
Interceptor traps are the bed bug equivalent of foxholes. Slip them under your bed legs and they turn into moats.
Bed bugs march out for their nightly blood mission, then tumble into the outer ring. Try to retreat, they get stranded in the inner ring. No climbing out, no second chances.
Testing by Tom’s Guide confirms these little dishes expose infestations within one to two weeks. That’s faster intel than most pest inspections.
The only catch is your bed must be isolated. No wall contact, no blankets hanging to the floor, no charging cords acting as bridges. If your fortress isn’t sealed, the scouts can’t do their job.
Expect to pay $8–15 for a 4-pack of professional-grade interceptors, which last six to twelve months with cleaning. ClimbUp and BlackOut dominate the field, and for good reason.
Cheap knockoffs? Bugs can climb them. That’s like buying sandbags that leak.
Check them every 3–4 days at first, then weekly. Outer ring catches mean the enemy is coming in from the field. Inner ring catches mean they were already entrenched in your bed. Both confirm you’re under attack.
CO₂ and Scented Lure Traps: The Ambush Specialists
Bed bugs hunt you by tracking CO₂ and body heat. Scented traps weaponize that instinct by simulating a sleeping host. They cost more ($25–60 each) and work best as reinforcements, not as your only defense.
In untreated rooms, interceptors are more dependable. But if you’ve already gone through professional treatment and want to know if stragglers survived, a CO₂ trap in the corner can catch them before they regroup.
Real options you can choose from are SenSci Volcano and Verifi. Sticky traps from the hardware aisle are pure junk. Bed bugs walk around them like seasoned soldiers avoiding landmines.
Placement Strategy: How to Keep Your Sentries Alive
Placement makes or breaks the mission. Put interceptors on hard, level flooring.
No carpets swallowing them. No nightstand pressed against the bed acting as a ladder. Even a dangling phone charger becomes an enemy bridge.
For shared housing or apartments, position a trap near closets or luggage zones too. Bed bugs often hitchhike in with clothes or bags before they hit the bedroom.
Clean traps monthly with soapy water to keep surfaces slick. A dirty interceptor is a useless interceptor.
Reading the Intel: Decoding What Your Scouts Report
One bug in two weeks? That could be an early incursion or a lone hitchhiker. Multiple catches over time? You’re dealing with an entrenched force that requires professional reinforcements.
Empty traps after several weeks usually mean you’re clear but don’t call victory too soon. Bed bugs can stay dormant for weeks. Keep monitoring another month before lowering your guard.
Be careful of false alarms. Carpet beetles and spider beetles sometimes fall into interceptors. Always confirm your ID using EPA photo guides before assuming it’s bed bugs.
When Monitors Fail: Time to Call the Heavy Artillery
Interceptors only catch bugs crawling across floors. They won’t stop paratroopers dropping from ceiling fixtures or guerillas hiding deep in mattresses and outlets.
If your traps stay empty yet the bites continue, your scouts are missing the action. That’s when you need a professional inspection.
Licensed exterminators deploy advanced monitors, CO₂ generators, pheromone lures, even bed bug detection dogs.
If your inspection already turned up multiple physical signs — fecal spots, shells, live bugs — don’t waste time with traps. This isn’t recon anymore. It’s war, and you need the pros.
Prevent Bed Bugs From Spreading in the First 24 Hours: Your Containment Mission
You’ve found the enemy. Maybe it’s fecal spots on the mattress seam, maybe it’s a shed skin, maybe it’s a live crawler you caught red-handed.
Your pulse spikes and the rookie mistake is to panic — rip sheets off, drag laundry through the hall, spray random pesticides everywhere. That’s how amateurs turn a single-room problem into a whole-house infestation.
What you do in the first 24 hours is not about killing bed bugs. It’s about bed bug containment, damage control, and preventing spread. You’re buying time while deciding whether to go DIY or call in professional pest control. Play it smart now and you’ll save thousands later.
Step One: Heat-Treat Laundry Like It’s Infected
Strip the bed completely: sheets, pillowcases, blankets, mattress pads, even the hoodie you tossed on the corner last night.
Don’t shake anything out. That scatters eggs like shrapnel. Roll items into tight bundles, bag them immediately, and seal the bags.
March those bags straight to your washer or a laundromat. Wash on hot (120°F or higher) when fabric allows, then blast everything in a dryer on high for at least 30 minutes. Heat is the one guaranteed bed bug killer — it destroys adults, nymphs, and eggs.
For items that can’t be washed (pillows, stuffed animals, delicate fabrics), the dryer alone works: 40–60 minutes on high heat.
Laundromat dryers run hotter than home units, so if you want maximum kill power, that’s your best bet. Always re-bag clean items in fresh bags to avoid re-contamination on the way home.
Side note: This is the fastest, safest way to kill bed bugs in clothes, bedding, and laundry without chemicals.
Step Two: Mattress Encasements = Lockdown
Your mattress is enemy territory, and right now you don’t have time to tear it apart. A bed bug proof mattress encasement turns it into a prison.
It traps any survivors inside and gives you a smooth surface for easy inspections.
Don’t confuse regular mattress protectors with the real deal.
You need encasements with fine-toothed zippers and sealed seams, otherwise bed bugs will slip through like soldiers sneaking past a fence.
Expect $30–60 for a queen size. It’s money well spent, whether you’re DIYing or hiring pros.
Encasements must stay on 12–18 months. Bed bugs can starve, but they’ll hold out for up to a year. Take the cover off too early and you’ve just paroled your enemy back into your bedroom.
Step Three: Protect Kids and Pets First
Children and pets are innocent bystanders, but they’re also the most vulnerable to sloppy treatment attempts.
Forget sprays and especially bug bombs (total scam, they scatter bugs into new hiding spots while leaving chemicals everywhere).
Run stuffed animals, blankets, and pet bedding through high heat drying cycles ASAP.
Kids’ items are prime hiding spots, and heat is safer than chemicals.
Create a clean zone in a bathroom or laundry room to store heat-treated toys, clothes, and blankets until the infestation is under control.
Dogs and cats don’t usually get bitten often, but they can carry bed bugs in their fur from one room to another. Don’t move them into clean bedrooms until you’ve confirmed containment.
Step Four: Vacuum Like a Sniper, Not a Janitor
Vacuuming can help but do it wrong and you’ll spread bugs. Focus only on the confirmed areas such as mattress seams, bed frame joints, carpet edges around the bed.
Use the crevice tool and move slowly so suction actually works.
As soon as you’re done, bag the vacuum contents. Tie the bag tight and throw it outside.
If your vacuum uses a canister, dump it into a sealed bag, then wipe the canister and attachments with rubbing alcohol.
Don’t leave it sitting in your house, because yes — bed bugs will crawl right back out.
Pro tip: Don’t vacuum the whole house yet. Stick to the infested zone to avoid turning your vacuum into a transport vehicle.
Step Five: Create Buffer Zones and Document Evidence
Treat this like a quarantine. Clear unnecessary items from the room: extra pillows, decorative throws, piles of clothes, or electronics you don’t need immediately.
Every extra object is another place for bed bugs to hide or hitchhike.
Next, document everything. Take timestamped photos of spots, bugs, stains, and your containment setup.
If you’re renting, this is proof for landlords. If you hire professionals, this log helps them build a treatment plan faster.
Keep a written record of every action: what you heat-treated, when you vacuumed, what you saw. This is a tactical intel.
Professionals love it because it speeds up eradication, and it helps you measure whether containment is working.
The 24-Hour Rule: Contain or Regret
If you knock out these steps within 24 hours of discovering bed bug activity, you’ve done two critical things:
- Prevented spread of bed bugs to other rooms.
- Made any future treatment (DIY or professional) more effective and less expensive.
Mess around or delay, and you give bed bugs time to spread, multiply, and fortify new hiding spots. Containment is your first victory in this war.
Renter’s Playbook: How to Handle Bed Bugs Without Getting Screwed
When you’re renting, finding bed bugs isn’t just a pest problem, it’s a legal and financial landmine.
You’re not just fighting bugs — you’re also fighting lease agreements, landlord pushback, and the risk of getting stuck with bills you don’t owe.
Handle it wrong and you could end up paying thousands for treatments that are your landlord’s responsibility.
Worse, you might face eviction for “causing” an infestation you didn’t even start.
The next 48 hours are critical. Most tenants panic, skip documentation, or fire off emotional emails that weaken their legal protection.
This playbook gives you a battle plan: stay calm, gather proof, and communicate like a pro.
When you act strategically, you protect your tenant rights, avoid unnecessary costs, and force action from your landlord without burning bridges.
Step 1: Document Everything Before You Call
Your phone is your weapon. Use it.
- Photograph all evidence: fecal spots, shed skins, blood stains, or live bugs. Place a coin or ruler in each photo for size reference, and keep the date/time stamp visible.
- Log the details: Example: “Three fecal spots on mattress seam, head of bed, east side. Photos taken 2:15 PM, January 15.”
- Prove cleanliness: Take wide shots of your room showing that it’s tidy and well-kept. This shuts down any claim that “messy living” caused the problem.
- Back up everything: Save photos and logs to your phone, email, and cloud storage. If disputes happen, you’ll need evidence to protect yourself.
Think of this as building your case file. If your landlord tries to dodge responsibility, you’ve got receipts — literally.
Step 2: Contact Your Landlord with a Script
You’ve got 24 hours to notify your landlord. Waiting longer can shift blame onto you under most lease agreements.
But don’t call them in a rage. Stay cool, stick to the facts, and use this script:
“I’m reporting a bed bug issue in my unit at [address]. I discovered evidence today and have photos and documentation. I’ve contained my belongings and avoided using pesticides. When can we schedule a professional inspection?”
Key tactics:
- No panic, no accusations. You’re just presenting facts.
- Avoid phrases like “infestation” or “disgusting”. Stick to “evidence” and “inspection”.
- Follow up with an email summarizing your call. This creates a paper trail.
Landlords can delay, deny, or deflect. Documentation and calm communication corner them into action.
Step 3: Know Your Tenant Rights and Responsibilities
Bed bugs in rentals fall under housing law, not guesswork. Here’s the breakdown:
- Landlord responsibility: In most states, landlords must provide pest-free housing and handle bed bug extermination unless you caused the problem.
- Tenant responsibility: Report the problem quickly, prep for treatment (bagging laundry, clearing furniture), and follow exterminator instructions.
- Your protection: Keep receipts for anything you buy during containment — laundry, mattress encasements, sealed bags. Many states let tenants recover these costs.
Never spray DIY pesticides without landlord approval. Using foggers or sprays can violate your lease and give them an excuse to pin the blame (and the bill) on you.
Step 4: Counter Common Landlord Excuses
Here’s how to shut down the most common excuses:
- “You brought them in.” → “Bed bugs spread through walls, pipes, and shared spaces. Let’s focus on getting a professional inspection.”
- “This is your responsibility.” → “Our lease and housing codes show pest control is typically the landlord’s duty. Can you point me to the clause that says otherwise?”
- “Just spray some bug killer.” → “Professional pest control is the only proven method. DIY sprays make infestations spread.”
- “We’ll deal with it later.” → “Bed bugs multiply fast. Housing codes require prompt response. Can you confirm a timeline for inspection and treatment?”
Stay calm, firm, and factual. You’re not arguing, you’re forcing accountability.
Step 5: Don’t Trash Your Furniture (Yet)
The rookie mistake most people make is tossing your mattress or couch on the curb. Bad move.
- Most infestations can be treated without destroying furniture.
- If you throw items out without written landlord approval, they can claim you destroyed evidence or acted outside lease rules.
- If disposal is required, wrap items in plastic, label them clearly as “bed bug infested”, and ask your landlord for replacement compensation.
And never move furniture to storage, common areas, or a friend’s place. That just spreads the infestation and puts liability back on you.
Step 6: Work with Real Professionals
Demand licensed pest control technicians with bed bug experience, not general exterminators.
Ask for:
- Copies of all inspection and treatment reports.
- Any warranties or follow-up guarantees.
- A clear treatment schedule with preparation instructions.
Cooperate fully: bag clothes, prep the unit, follow every direction. Keep receipts and records of your time, expenses, and temporary housing costs. In many states, landlords must cover these if they’re responsible for the infestation.
The Smart Renter’s Advantage
The tenants who win aren’t the ones who panic or yell. They’re the ones who:
- Document ruthlessly
- Communicate like pros
- Know their tenant rights
- Push for professional bed bug extermination
Do that, and you keep the infestation contained, force proper treatment, and protect yourself from financial fallout. Fail to do it, and you’ll be paying for a fight that isn’t yours.
When to Call a Pro, What to Expect
Most bed bug infestations laugh at DIY methods. Sprays from the hardware store, foggers, or “natural” remedies won’t win this war.
At best, they give you a false sense of victory. At worst, they scatter bed bugs deeper into walls and furniture, making them harder to kill.
Professional exterminators bring weapons you don’t have: commercial-grade pesticides, industrial heat treatment equipment, and years of specialized experience.
The real question isn’t “Can I afford pest control?” It’s “Can I afford the damage if I don’t get it right the first time?”
A failed DIY attempt usually turns a one-room problem into a whole-house nightmare.
Clear Signs It’s Time to Call a Bed Bug Exterminator
Think of your inspection like when a spy watches a building before a mission to see where guards are.
If you spot these signs, you’ve crossed the line where DIY is useless:
- Multiple types of evidence in one room: fecal spots, shed skins, and eggs. That means a colony has been feeding and breeding for weeks.
- Bed bug activity in multiple rooms: once they spread, only coordinated treatment across rooms can stop them.
- Interceptor traps catching 2–3 bugs per week: occasional bugs mean monitoring works, but steady catches mean a breeding population.
- Ongoing bites despite encasements and cleaning: if they’re still finding you, they’ve set up camp in furniture, walls, or hidden spaces.
Each of these signals screams the same thing: call in licensed bed bug exterminators now.
Treatment Options: Heat vs Chemicals
Once you bring in the pros, you’ll likely face two main treatment options:
- Heat Treatment
- Raises rooms to 120–140°F for hours, killing all stages (including eggs).
- One-day process, no chemical residue, safe for pets and kids.
- Downsides: $2–4 per sq. ft, no residual protection, and you must remove electronics.
- Chemical Treatment
- Professional-grade pesticides applied in cracks, crevices, and furniture.
- Requires 2–3 visits over 4–6 weeks but leaves residual protection that kills bugs hatching later.
- Downsides: prep work (bagging, cleaning, moving items), possible sensitivities, slower results.
Many pest control companies now use integrated treatment: a fast heat knockdown plus targeted chemical follow-ups for long-term success.
What Success Really Looks Like
Don’t believe anyone promising “one-and-done” extermination. Realistic timelines:
- Chemical methods: 2–3 visits, spaced 10–14 days apart.
- Heat methods: 1–2 treatments plus monitoring.
Expect an 80–90% drop in activity within the first week, but don’t panic if you see the occasional straggler.
Eggs hatch 10–14 days after treatment, which is why follow-up visits are critical.
True success means 6–8 weeks of zero signs: no new bites, no fecal spots, no catches in traps.
Success rates hit 85–95% when tenants follow prep instructions. The 5–15% failure rate usually comes from poor prep or reintroduction from neighbors.
Cost Ranges and Hidden Expenses
Here’s the financial battlefield map:
- Small bedroom treatment: $300–$800
- Whole apartment: $800–$2,000
- Multi-room house: $1,500–$4,000
Heat costs about 50–100% more than chemicals, while combo treatments sit in the middle. Always budget 20–30% extra for supplies, laundry, or replacing unsalvageable furniture.
Tip: ask about financing or insurance coverage. Some homeowner’s insurance policies cover bed bug treatments, but you need to read the fine print.
Avoiding Bed Bug Scam Artists
Not all “professionals” are equal. Red flags include:
- Door-to-door sales or cold calls.
- Price quotes without an inspection.
- High-pressure “today only” discounts.
- No written contract, no license, no insurance.
Real pest control companies provide clear written estimates, service warranties, and references.
Questions to Ask Before Hiring
- What’s your success rate, and how do you define success?
- What prep is required from me, and what if I can’t finish it?
- What kind of warranty do you offer, and what does it cover?
- Can you provide references from recent bed bug treatments?
The Smart Action Plan
DIY is fine for prevention and monitoring, but once you confirm an infestation, the battlefield shifts.
Hire a licensed professional, choose the right treatment plan, and follow preparation instructions like your sanity depends on it. Because it does.
Photos: What Each Bed Bug Sign Really Looks Like
Words alone don’t win the fight against bed bugs. When it comes to spotting an infestation, you need visuals.
Bed bug droppings, bed bug shells, and bed bug eggs all have distinct looks and if you can’t identify them correctly, you’ll either waste time chasing false alarms or let the enemy multiply under your nose.
Think about it: the difference between a harmless ink stain and actual bed bug feces could mean catching the invasion early or fighting a full-blown infestation later.
Below, you’ll see how to identify bed bugs by their droppings, shells, eggs, and blood stains.
This is your field manual, the difference between confident action and costly mistakes.
Fecal Spots: The #1 Reliable Sign
Tiny black dots near your mattress seams aren’t decoration, they’re bed bug droppings.
These fecal spots are one of the most reliable early warning signs of an infestation.
Here’s the combat test: touch the spot with a damp cloth.
If it smears into a rusty-brown streak, you’re staring at bed bug feces. Dirt or ink stains won’t behave that way.
Fresh droppings might look slightly raised, while older ones dry flat. And if you see them grouped in clusters of 3–10 along mattress seams, box springs, or headboards, that’s bed bug waste from nightly blood meals, not random household debris.
Blood Stains: Crushed Bug Evidence
Those brownish-red smears on your sheets are not just laundry problems, they’re crushed bed bugs.
Unlike bright red human blood, these stains are dull, rust-colored, and irregular in shape.
They typically show up in pressure points: pillowcases, fitted sheet corners, or torso-level areas. If blood stains appear alongside fecal spots, you’ve got stacked evidence.
Think of it this way: large, fresh red stains usually come from human cuts.
Small, brownish smears mean you rolled over and squashed a blood-fed bed bug in your sleep.
Shed Skins: Bed Bug Shells That Prove Growth
Every growing bed bug leaves its old armor behind. These discarded shells called exuviae are golden-brown, translucent, and shaped exactly like the bug itself.
Bed bug shells are rigid, not fluffy like lint, and they range from 2 to 5 millimeters depending on the bug’s stage.
Finding multiple bed bug shells in the same crack or crevice is bad news: it means you’re dealing with an active breeding colony, not just a stray hitchhiker.
Common hiding spots include mattress seams, baseboards, and behind headboards.
Eggs and Eggshells: The Future Infestation
Here’s how to identify bed bug eggs: they’re pearl-white, oval, and about the size of a pinhead (1 millimeter).
Fresh eggs have a glossy shine, while empty eggshells look matte with a small cap-like opening.
Eggs are often laid in clusters of 5–20 and cemented firmly to fabric or wood.
Unlike lint or crumbs, bed bug eggs don’t brush off easily. If you find tiny white specks stuck in mattress seams, carpet edges, or furniture joints, you’ve just uncovered the next wave of bloodsuckers.
Live Bugs: The Ultimate Proof
At the end of the day, spotting a live bug is the ultimate confirmation. Adult bed bugs are reddish-brown, apple-seed sized (5–7 millimeters), and flat unless they’ve fed.
Nymphs are smaller, nearly translucent, and harder to spot until they’ve had their first blood meal.
Bed bugs don’t jump or fly, and they rarely stray far from sleeping areas.
Compare carefully: carpet beetles are fuzzy, spider beetles have long legs, and booklice are lighter and smaller.
Real bed bugs are flat, oval, and built for hiding in cracks.
How to Document Evidence Like a Pro
If you think you’ve found bed bug droppings, shells, or eggs, don’t just panic — document.
Grab your phone, switch to macro mode, place a coin or ruler for scale, and snap close-up shots. Save with timestamps and note the exact location.
Even better, collect specimens in a clear container or bag.
Avoid tape, since it crushes bugs and ruins ID. Compare your findings with EPA or university extension guides to confirm.
And remember, one sign alone might be misleading. But when you find multiple forms of evidence like droppings, eggs, shells, and stains all in the same zone, the battle is already underway, and it’s time to strike.
FAQ: Early Signs of a Bed Bugs Infestation
Still unsure if those dark spots, itchy bites, or strange odors point to bed bugs? You’re not alone.
Early signs can be confusing, and myths make it worse. That’s why we’ve pulled together expert-backed answers from trusted health agencies, pest control professionals, and real inspection data.
This FAQ provides you with clear, fact-checked guidance so you know what’s real, and what steps actually help you confirm an infestation early.
What are the first signs of bed bugs?
The most reliable early signs are:
- Fecal spots: tiny black dots that smear reddish-brown when wiped (dried blood).
- Blood stains: rusty-looking spots on sheets or pillowcases.
- Shed skins: clear or tan shells in mattress seams and furniture cracks.
- Eggs: tiny, white, about 1 mm long, stuck to hidden surfaces.
- Live bugs: small, flat, reddish-brown insects (1–7 mm depending on age).
Don’t rely on bite marks alone. Reactions to bite differ in some people. Some react within hours, others take up to 14 days, and about 30% don’t react at all.
Do bed bug bites appear in lines?
Sometimes bites show up in lines or clusters, but this isn’t proof. The “breakfast, lunch, dinner” pattern is more myth than science. Bed bugs bite wherever they find a blood vessel close to the skin. Mayo Clinic warns: doctors can’t confirm bed bugs from bite patterns alone.
What does bed bug poop look like?
It looks like someone dotted your sheets with a black pen. These spots are dark brown to black, often found in clusters near your bed. Test it: dab with a damp tissue. If it smears reddish-brown, that’s bed bug feces. The U.S. EPA lists fecal spots as one of the most consistent warning signs.
Is there a bed bug smell?
Yes, but usually only in moderate to heavy infestations. Professional pest companies describe the odor as musty and sweet, like overripe berries or wet towels. Small infestations don’t produce enough odor to notice. The smell comes from pheromones released when many bugs are present.
Do traps get rid of bed bugs?
No. Traps are for detection and monitoring, not elimination. Interceptor traps catch bugs traveling to and from their hiding spots. They’re excellent for confirming infestations and tracking treatment progress, but you’ll still need professional extermination or proven DIY methods for full elimination.
How fast do bed bugs spread?
They spread mostly by hitchhiking on clothes, luggage, used furniture, or other belongings. A single pregnant female can start a whole infestation. Under good conditions, one bug can turn into 5–10 within six weeks. The U.S. EPA notes most bed bugs stay within 8 feet of where people sleep, but they’ll move farther if food becomes scarce.
How soon do bed bug bites show up?
Bite reactions are unpredictable. They may show up within minutes or take up to 14 days. Some people never react at all. That’s why experts (California Department of Public Health, Washington State DOH) emphasize relying on physical evidence instead of bites.
Conclusion: From Guesswork to Action
Now you know the five reliable early signs: fecal spots, blood stains, shed skins, eggs, and live bugs. Bites can mislead you, but physical evidence never lies.
Here’s your simple decision plan:
- 3+ signs in one area: Confirmed infestation, take action now.
- 1 suspicious sign: Use interceptor traps for 2–3 weeks.
- No evidence after full inspection: Likely another issue.
Today’s Checklist
- Do a 10-minute bedroom inspection with a flashlight.
- Photograph any suspicious evidence with size references.
- If signs are present: heat-treat laundry, add mattress encasements, create buffer zones.
- Set up interceptor traps for monitoring.
- If renting: report findings to your landlord within 24 hours.
- Multiple signs = schedule a professional inspection ASAP.
Professional help saves money long term compared to failed DIY attempts. Early action prevents a minor infestation from turning into a nightmare.
Important safety note: If you’re pregnant, immunocompromised, or have severe allergic reactions to bites, skip DIY pesticides and call a licensed pest control company immediately.
Always follow pesticide labels and never use outdoor products inside.
The good news is If you spot the early signs, you’re ahead of the game. Interceptors and monitoring tools help track progress.
Professional treatments or targeted DIY steps can stop the spread before it gets out of control.
Your next step depends on what you found but now you can make that choice with confidence.